Glue Block Prints · Craftwhack
In traditional block printing, you lot carve away at a block of forest to leave a raised epitome. Y'all then spread ink or pigment over the image and press onto paper to make your impress. Glue block prints are a child-friendly style of replicating this idea as in that location is no carving involved.
Plus, drawing with glue is super-fun. Peculiarly if you spread some gum over your palm afterward, and allow information technology dry while y'all watch Television receiver and so peel it away and marvel at your dead skin cells stuck to the glue. I digress.
Materials:
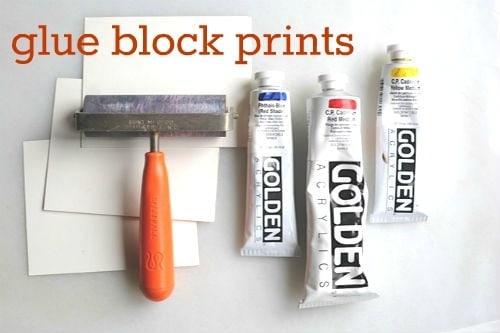
- cardboard
- glue with nozzle top
- 2 brayers (rollers)
- newspaper
- ink or acrylic paint
- printing tray (or aluminum foil covered cutting lath)
1. Describe with the glue onto the cardboard, or make a pencil drawing starting time and get over information technology with the glue. You may desire to practice offset on some scrap paper to get a feel for how quickly the glue comes out.
two. After the glue is dry, clasp out some ink onto a printing tray and coat a roller with ink (or paint- we used acrylic thinned with water then information technology wasn't too gloppy). Of course, we don't have a printing tray lying around, even though I may accept to change that very soon. So we used aluminum foil to curlicue the pigment onto. Plus, I squeezed 2 colors downwards and partially mixed them together. This gives the effect of different colors on your print.

3. Curlicue your roller into the ink and so spread it over your glue drawing.
iv. Place your paper over the inked-up gum drawing and roll over that with the clean roller.

5. If you like, yous can add another layer of a dissimilar color ink over your first and endeavour some more printing. After the prints are dry, you can become back in with marker, colored pencils, water color, etc. to add some multi-media interest to your print.

Tips: Gum flattens out somewhat when it dries, so you lot may want to go over the initial mucilage lines with another layer of glue for bolder lines. Don't go too detailed with your glue drawing, as the glue comes out speedily and spreads! Thoroughly rinse the paint roller, and wipe downwards your glue print before switching to a new color, otherwise your colors will finish up muddy looking.
What practise you call up?

Source: https://craftwhack.com/glue-block-prints/
0 Response to "Glue Block Prints · Craftwhack"
Post a Comment